Salesforce

Freely Manage Salesforce with SaaSConsole

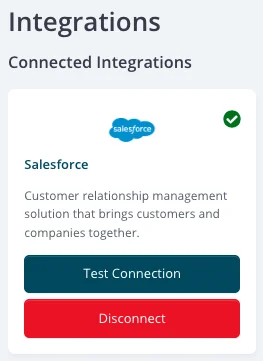
SaaSConsole lets you manage your Dropbox chatter groups and permission sets all within one platform. Automate creating your users, update your groups and much more-no code required.

Conntect Salesforce to SaaSConsole

Connect to SaasConsole

Requirements:

  • Salesforce Account.

Steps:

1. Login to SaaSConsole.
2. Navigate to the Integration section.
3. Find Salesforce integration at https://app.saasconsole.com/integrations.
4. Click on the Connect button.
5. Sign in with Salesforce.

Manage Chatter within SaaSConsole

Requirements:

Steps:

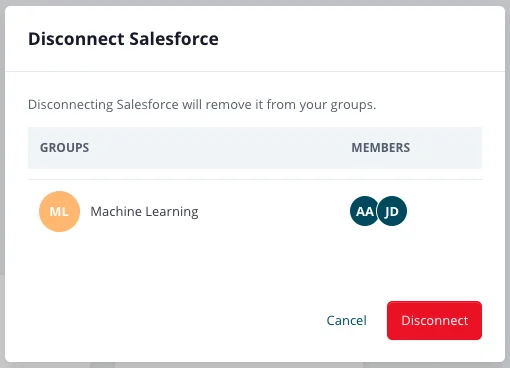
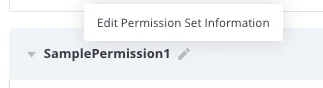
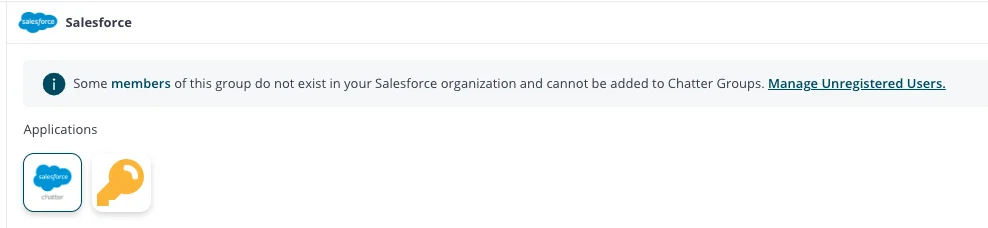
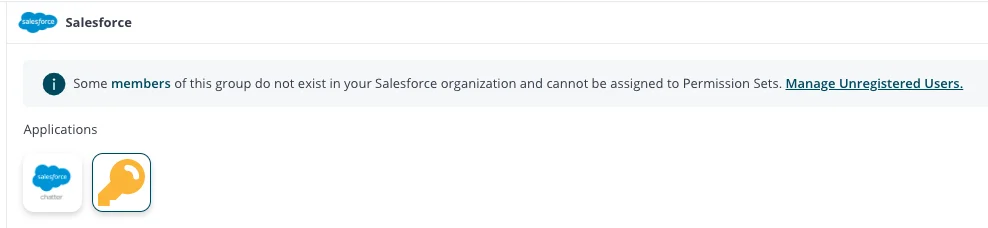
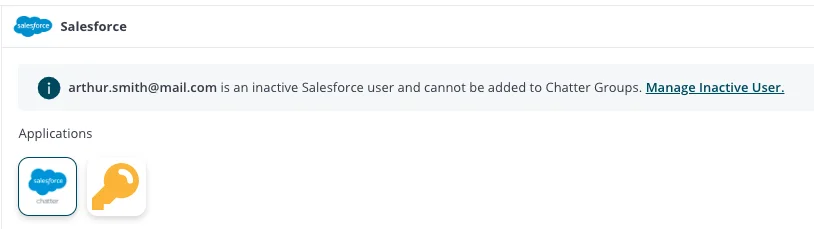
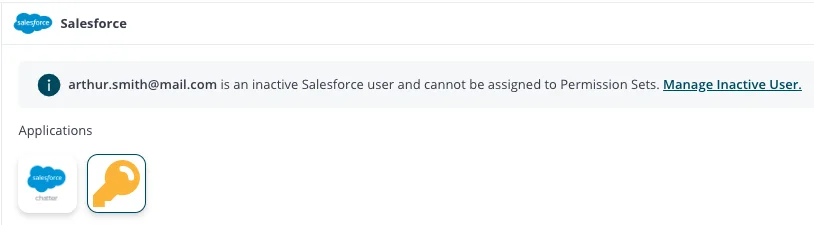
1 Under Salesforce Integration, click on Chatter. This feature allows you to manage the Chatter groups and their members.

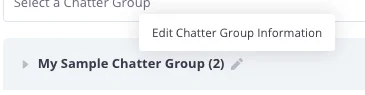
2 Click on the dropdown option to view all the available Chatter groups.

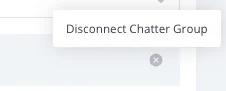
3 Select a Chatter group you want to connect to your SaaSConsole group and its members. This action takes the members of your SaaSConsole group and adds them as members to your selected Chatter group.

Requirements:

Steps:

1. Under Salesforce Integration, click on Salesforce Chatter. This feature allows you to manage the Chatter groups and its members.
2. Click on the add icon to create a Salesforce Chatter Group. This will open up the Create Chatter Modal.
3. To create a Chatter Group, the user is required to provide a Name. The user is also provided with an option to automatically connect the created Chatter Group to the SaaSConsole group by simply checking the option on the create modal.
4. Once satisfied with the Chatter Group information, click the Create button. This action will create a new Chatter Group to your Salesforce Account.

Requirements:

  • Connected Salesforce Chatter Group

Steps:

1. Under integration for Salesforce Integration, click Chatter. This feature allows you to manage the Chatter groups and its members.
2. To edit a Salesforce Chatter Group, navigate to the connected Salesforce Chatter name. Click on the icon to edit the Chatter group. This will open up the Edit Chatter Group Modal.
3. To edit a Chatter Group, users are allowed to update the Salesforce Chatter Group Name.
4. Once satisfied with the Chatter Group information, click the Update button. This action will update the Chatter Group on your Salesforce Account.

Requirements:

  • Connected Salesforce Chatter Group

Steps:

1. Under Salesforce Integration, click Salesforce Chatter. This feature allows you to manage the Chatter groups and its members.
2. To disconnect a Salesforce Chatter, navigate to the rightmost part of the connected Salesforce Chatter group name. Click on the circle with the “x” icon to disconnect the Chatter. This will open up the Disconnect Confirmation modal.
3. Once you are sure to disconnect the Chatter, click the Remove button. This action will remove the Chatter members from the SaaSConsole Group and its connection in the SaaSConsole Group.

Edit a Salesforce Permission Set through the SaaSConsole Group

Requirements:

  • User must have a Salesforce account.

Steps:

1. Under integration for Salesforce Integration, click Salesforce Permission Sets. This feature allows you to manage the permission sets within SaaSConsole.
2. Click on the dropdown option to view all the available permission sets.
3. Select a permission set you want to connect to your SaaSConsole group and its members. This action takes the members of your SaaSConsole group and assigns them to your selected permission set.

Requirements:

  • User must have a Salesforce account.

Steps:

1. Under Salesforce Integration, click Salesforce Permission Sets. This feature allows you to manage the permission sets within SaaSConsole.
2. Click on the add icon to create a new Salesforce Permission Set. This will open up the Create Salesforce Permission Set Modal.
3. To create a board, users are required to provide a Permission Set Name, Label, and License. Users also have the option to automatically connect the created Salesforce permission set to the SaaSConsole group by checking the option in the create modal.
4. Once satisfied with the Permission Set Information, click the Create button. This action will create a new Permission Set in your Salesforce Account.

Requirements:

  • Connected Salesforce Permission Sets

Steps:

1. Under Salesforce Integration, click Salesforce Permission Sets. This feature allows you to manage the permission sets within SaaSConsole.
2. To edit a Salesforce Permission Set, hover your mouse over the connected Salesforce Permission Set name, and a pencil icon will appear. Click on the icon to edit the Permission Set. This will open the Update Salesforce Permission Set Modal.
3. Users are allowed to update the Name and Label of the Salesforce Permission Set.
4. Once satisfied with the Permission Set information, click the Update button. This action will update the Permission Set on your Salesforce Account.

Manage Unregistered and Inactive Users within SaaSConsole

Requirements:

  • User must have a Salesforce account.

Steps:

1. Under Salesforce integration, click the "Manage Unregistered Users" alert in either of the Salesforce Applications. It will open the "Register Users to Salesforce" modal. The users in this modal are nonexistent in your Salesforce Account.
2. To register the users, the user is required to provide a Username, User License, and Profile.
3. Once satisfied with the Users information, click the Create button. This action will create and register the users to your Salesforce Account.

Requirements:

  • User must have a Salesforce account.

Steps:

1. Under Salesforce Integration, click "Manage Inactive Users" in the alert in either of the Salesforce Applications. This will open the "Activate Salesforce User Account" modal. The users in this modal have inactive account(s) in your Salesforce Account.
2. To activate the users, select a User License and Profile.
3. Once satisfied with the user information, click the Activate button. This action will activate the users' accounts in your Salesforce Account.

Disconnect from SaaSConsole

Requirements:

  • Salesforce Integration Connection

Steps:

1. Login to SaaSConsole.
2. Go to the Integration section.
3. Locate the connected integration.
4. Click on the Disconnect button.
5. A modal will appear showing the connected groups, if any.
6. Confirm the disconnection by clicking the Disconnect button.

Resources

Support
chevron-down-circle